Connecting with Remote Desktop - Windows 7
Microsoft has ceased security support for Windows 7 on 14 January 2020. This means that PCs running Windows 7 will no longer be safe to use.
Please contact your 1A partner to obtain a more recent operating system or a new PC.
This manual is for older systems and/or software and is no longer maintained.
This manual is meant for 1A-server users. It explains how to create a Remote Desktop connection. The Remote Desktop connection will enable the user to work on a computer from a different location, from home for example.
The Remote Desktop software is available in most versions of Windows, but is not in Windows XP Home. Before starting with this manual, check whether your computer has Remote Desktop software installed on it.
To be able to connect to a Remote Desktop, your username first has to be added to the list of Remote Desktop users by that computer's administrator.
If you are not connected to the company network, you have to set up a VPN connection first.
Requirements
To complete this manual, you will need:
- Your username and password
- The host name or IP address of the remote computer
Steps
1
Setup a VPN connection
- If you are not connected to the company network, you have to set up a VPN connection first
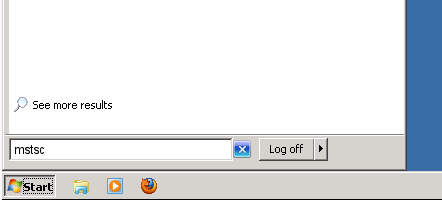
2
Start "Remote Desktop Connection"
- Click the start button
- Enter "mstsc" in the search field
- Press <ENTER> on your keyboard
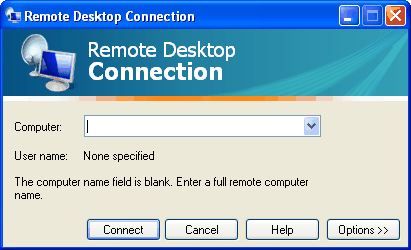
3
Enter Computer address
- After
Computer:enter the host name or IP address of the remote computer - Click
Options >>
4
Configure options
- Change the desired settings, for example sharing of network drives or printers
- Go to tab
General - Save the settings
5
Connecting
- Click
Connect