Placing a computer in the domain - Windows 7
Microsoft has ceased security support for Windows 7 on 14 January 2020. This means that PCs running Windows 7 will no longer be safe to use.
Please contact your 1A partner to obtain a more recent operating system or a new PC.
This manual is for older systems and/or software and is no longer maintained.
This manual is meant for users of the 1A-server. It explains how to add a computer to the Windows domain of your 1A-server. By adding computer to the Windows domain the computer will have full access to the server as much as your permissions allow. The computer will also become visible in the 1A-manager.
Requirements
To complete this manual, you will need:
- A computer connected to your 1A-server
- Your username and password
- The permissions of a Windows domain administrator
- The name of the Windows domain on your 1A-server
Steps
1
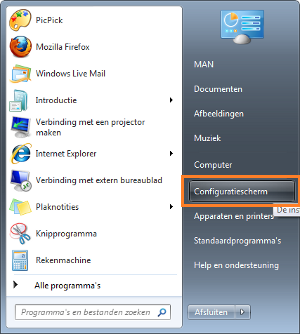
Open the Control Panel
- Click the start button
- Click
Control Panel
2
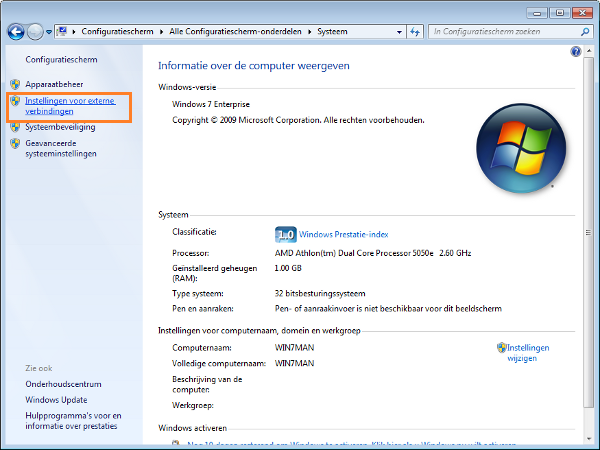
Open the property window of the computer
- Double-click
Systeem - On the left side, click
Remote Settings
3
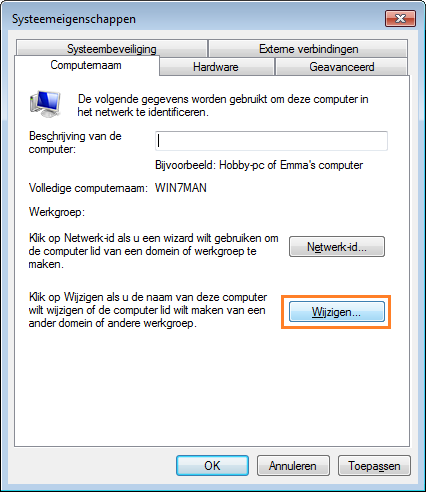
Open window Change identification
- Go to the tab
Computer name - Click
Change
4
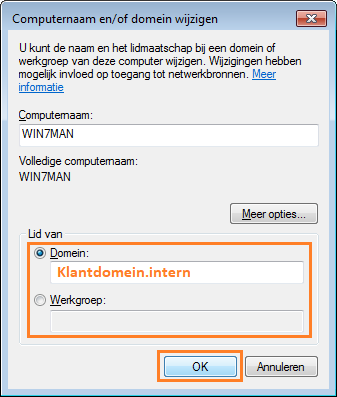
Add the computer to the Windows domain
- At
Member ofselectDomain: - Enter the name of your Windows domain
- Click
OK
5
Enter information
- Enter your username and password
- Click
OK

6
The computer will now be added to the Windows domain of your 1A-server
- If a confirmation window pops up, click
OK