Receiving faxes - Windows XP
Microsoft has ceased security support for Windows XP on 8 April 2014. This means that PCs running Windows XP will no longer be safe to use.
Please contact your 1A partner to obtain a more recent operating system or a new PC.
This manual is for older systems and/or software and is no longer maintained.
This manual explains how to receive faxes with your 1A-server. Your 1A-server contains a fax module which is able to send and receive faxes.
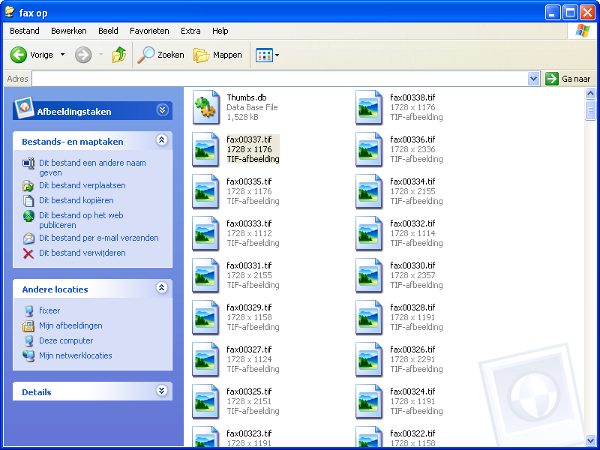
The fax module will save the received faxes in a separate share on your server: \\yourservername\fax.
If you wish to know how to send faxes via the 1A server, please see the manual Faxprinter Winprint HylaFAX.
Requirements
To complete this manual, you will need:
- The fax module has to be enabled and configured (please contact your 1A partner if this is not the case)
- Your username and password
- The name of your 1A-server
Steps
1
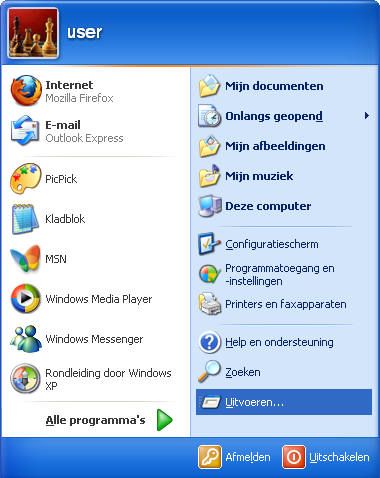
Open the fax share (1)
- Click the start button
- Click
Run
2
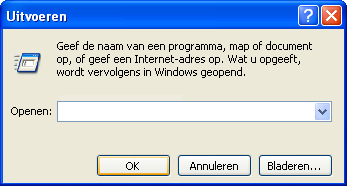
Open the fax share (2)
- Enter
\\yourservername\fax(substitute "yourservername" with the name of your 1A server) - Click
OK
3
Logging in
- Enter your username and password
- Click
OK
4
Opening received faxes
- Click any file here to open that particular fax message