Setting up a VPN connection (IPsec) - Windows 11
This manual is meant for 1A-server users.
It explains how you can make a secure connection to your company's network.
This way you can use your company's network just as when you are connected directly.
Only accounts that are a member of group "vpn" are allowed to connect through a VPN-connection.
Requirements
To complete this manual, you will need:
- Your username and password
- The "Server Address", "Server Name" and "Internal DNS-domain" of your 1A-server, you can find these in Server-info
Usage
1
Connect with VPN (1)
- Click
Start - Click
Settings

2
Connect with VPN (2)
- Click "
Network & Internet"

3
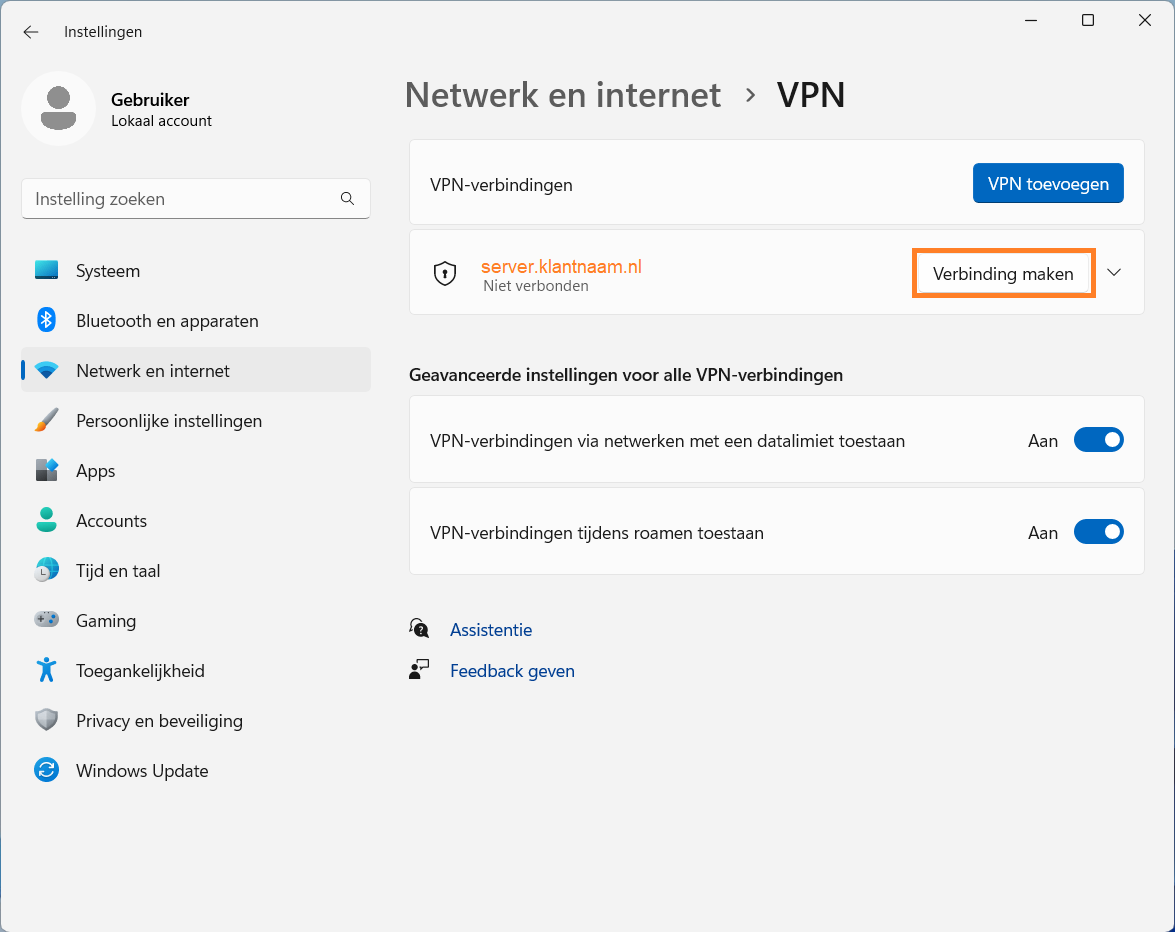
Connect with VPN (4)
- Click
VPN - Select the VPN-connection you want to use
- Click
Connect
4
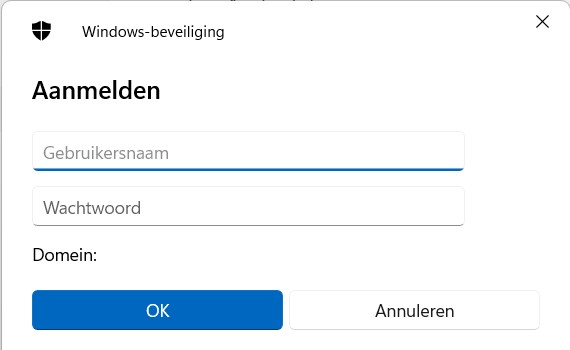
Authenticate
- If your user data is not saved, enter your
UsernameandPassword - Click
OK
5
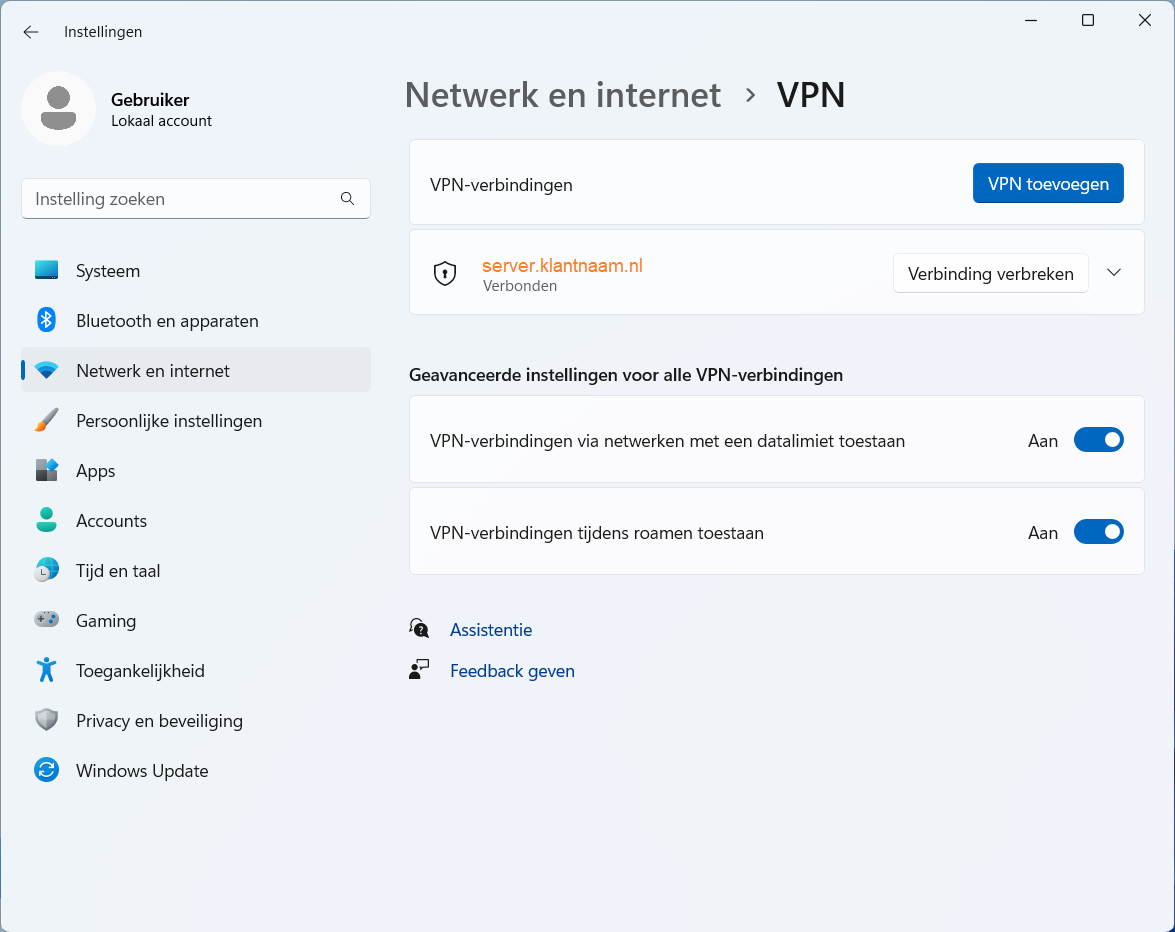
Connect with VPN (6)
- You are now connected to your office-network
- Your 1A-server is reachable by using the "
Server name" or "Server IP-address" that you can find in server-info - This way you can reach the shared folders on your 1A-server
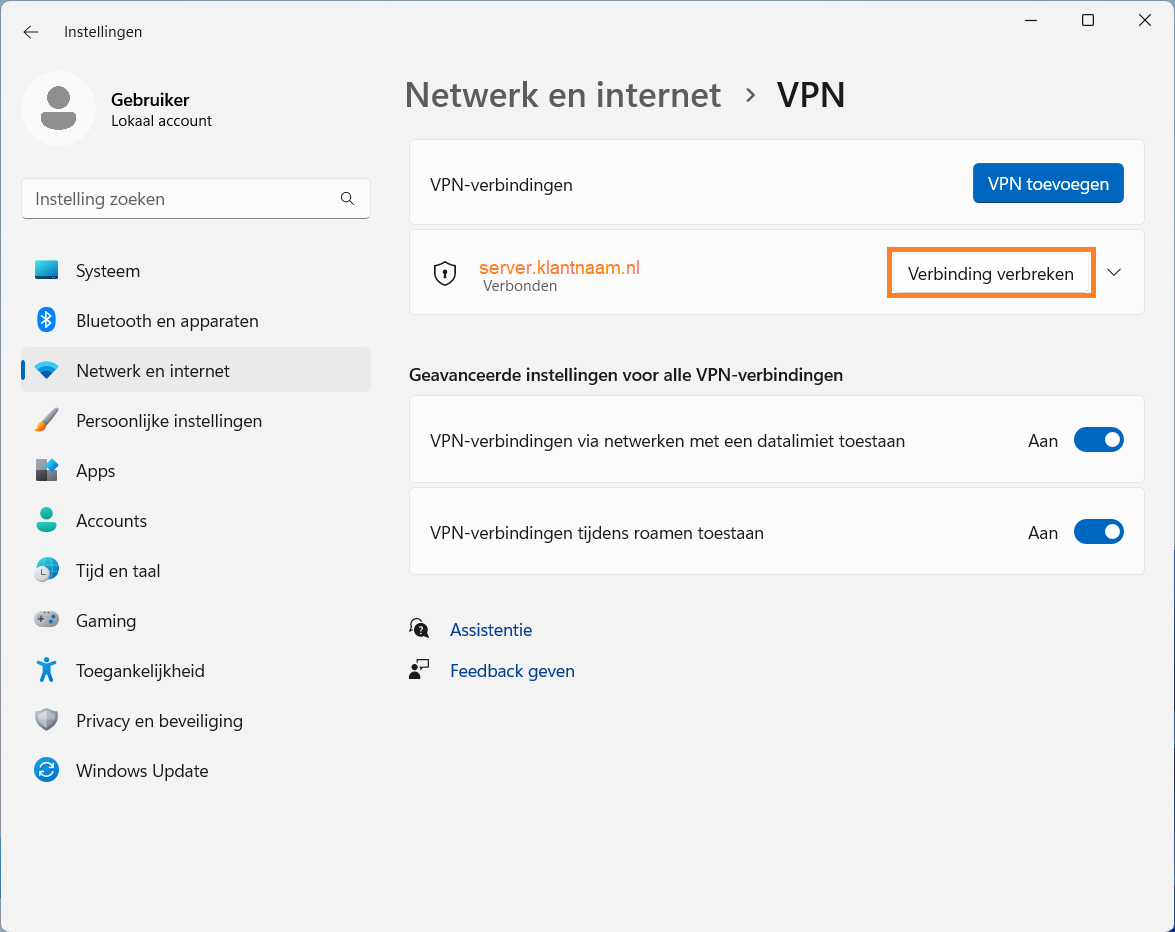
6
Disconnect VPN (1)
- Click
Start - Click
Settings - Click "
Network & Internet"
7
Disconnect VPN (1)
- Click
VPN - Click the VPN-connection you want to disconnect
- Click
Disconnect
Steps
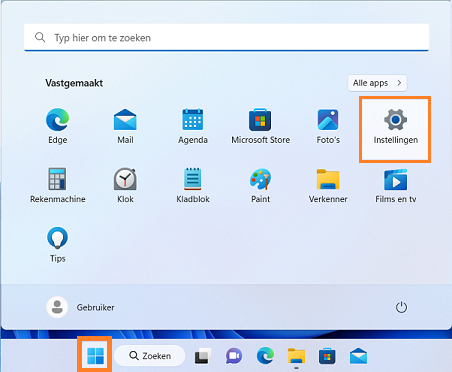
1
Open Windows Settings
- Click
Start - Click
Settings
2
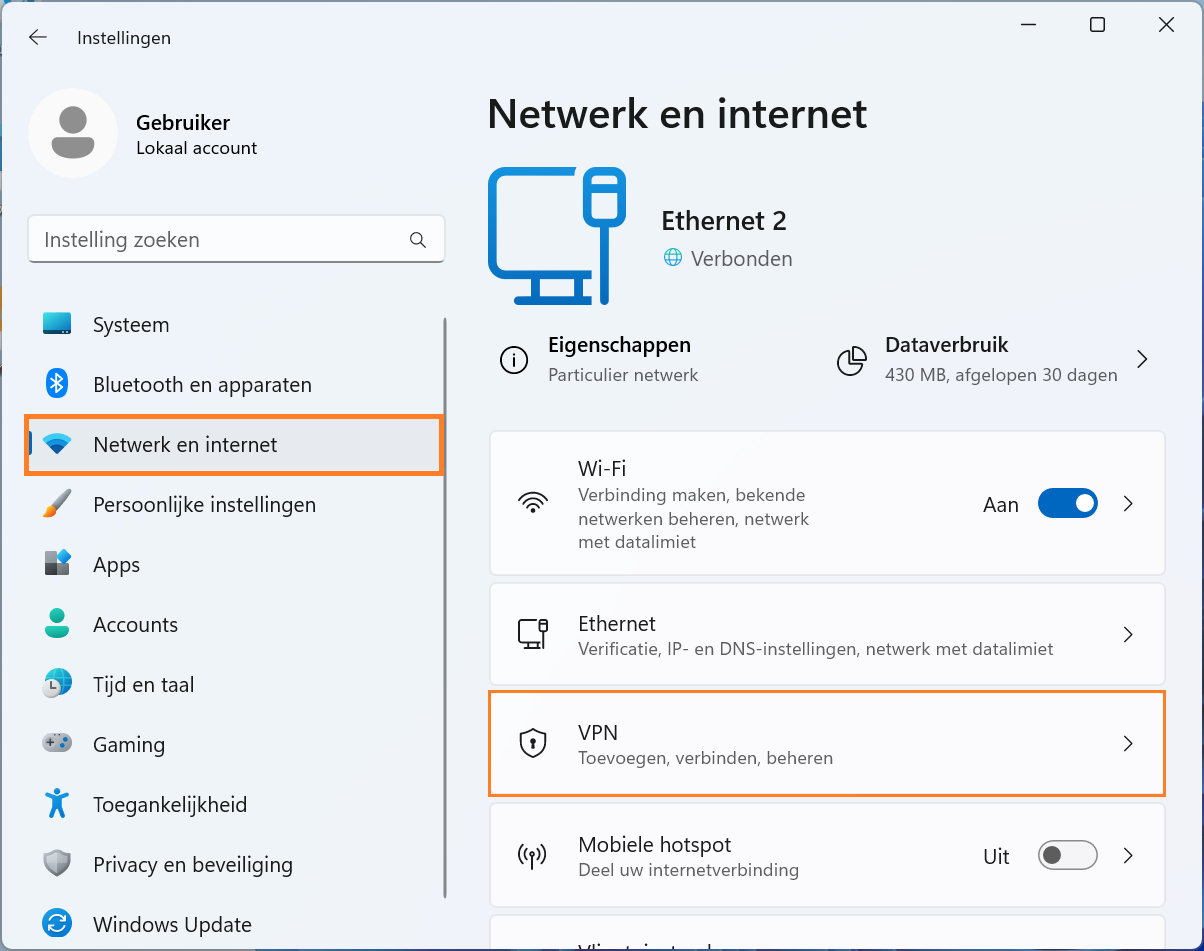
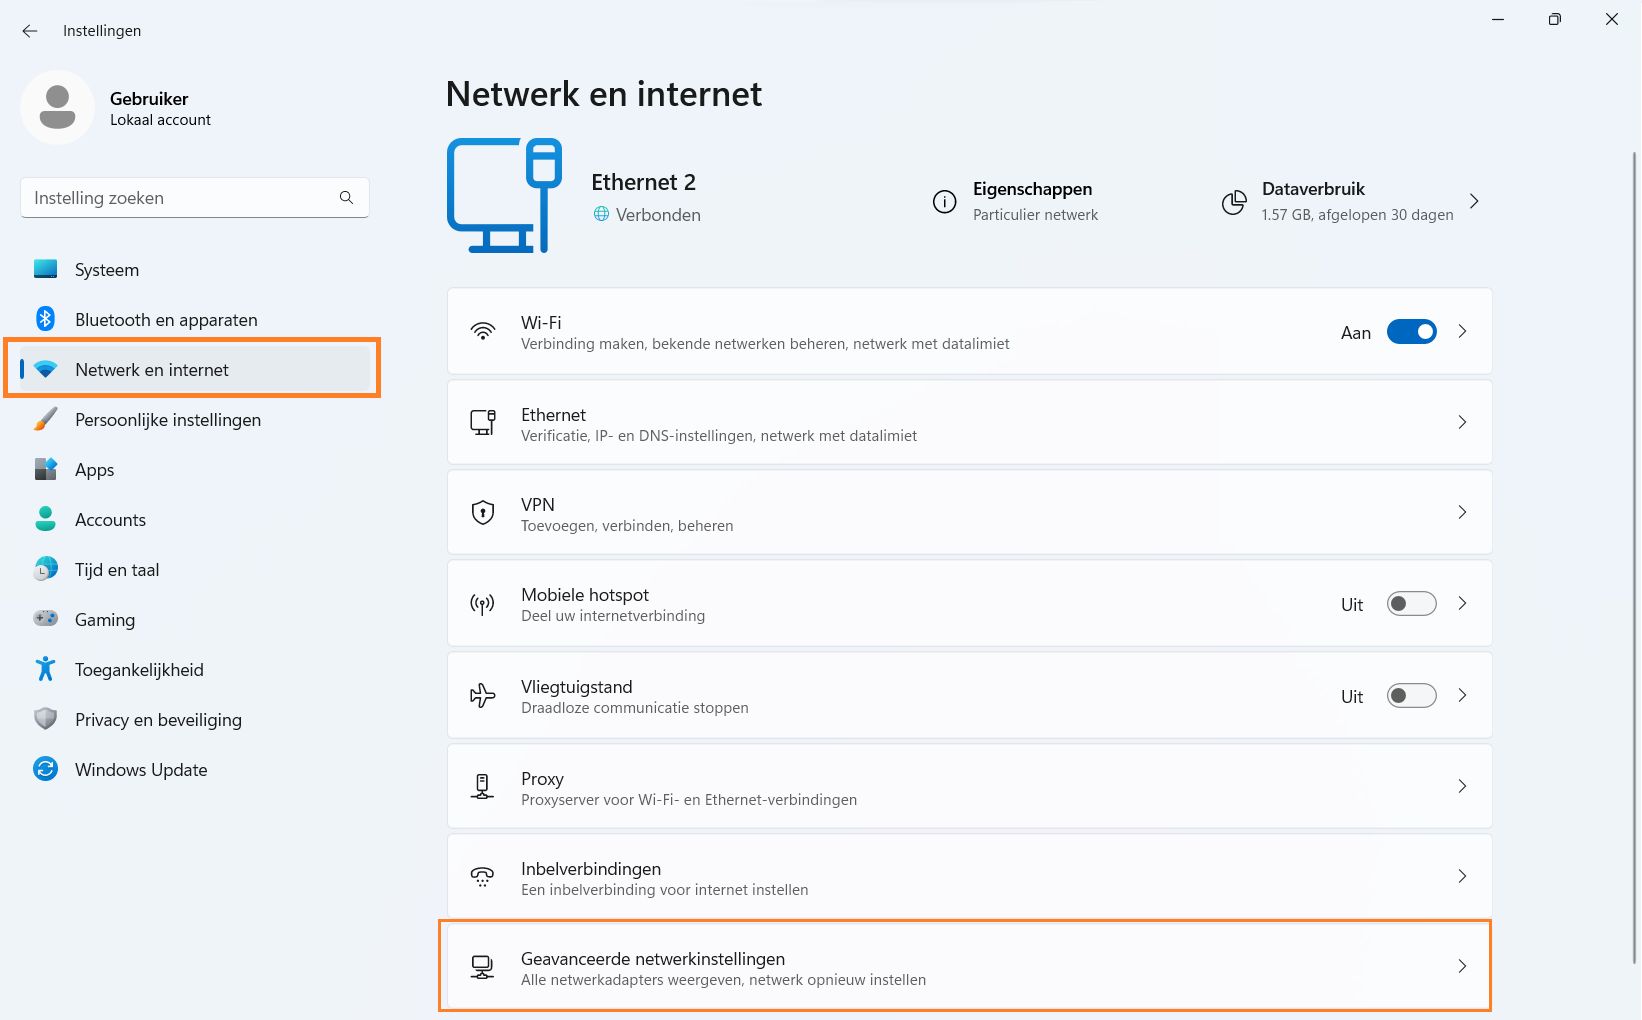
Open Network properties
- Click "
Network & Internet"

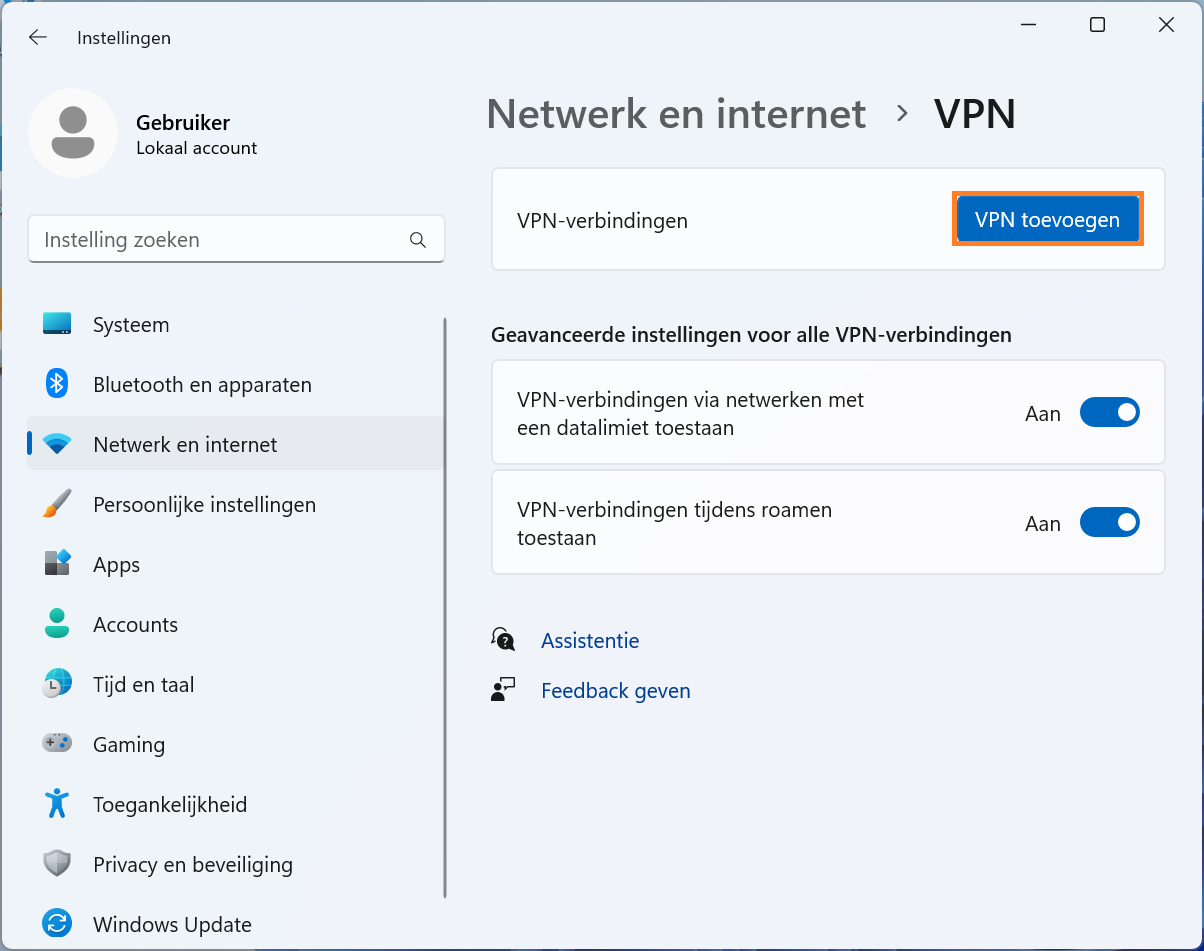
3
Open VPN settings
- Click
VPN - Click "
Add a VPN connection"
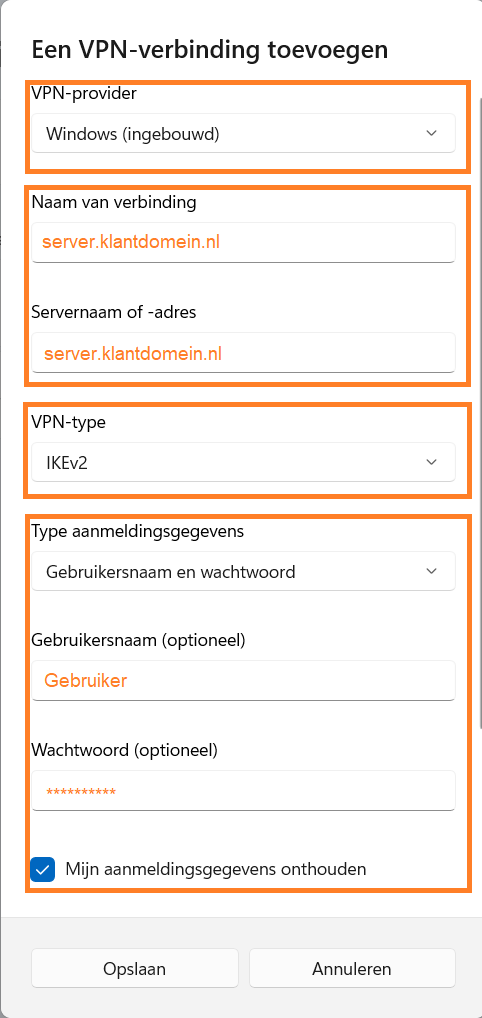
4
Create new VPN connection
- Field "
VPN Provider", select "Windows (built-in)" - Field "
Connection name", enter a name for the VPN-connection - Field "
Server name or address", enter the Server address of your 1A-server - Field "
VPN-Type", select "IKEv2" - Field "
Type of sign-in info", choose "Username and Password" - Enter your
UsernameandPassword - If you want to save your credentials, check option "
Remember my sign-in info" - Click
Save
5
The new VPN connecion has been created
- You can now use the VPN connection and reach your 1A-server on its Server IP-address
- To reach the 1A-server on its Server Name, a few more steps are needed
6
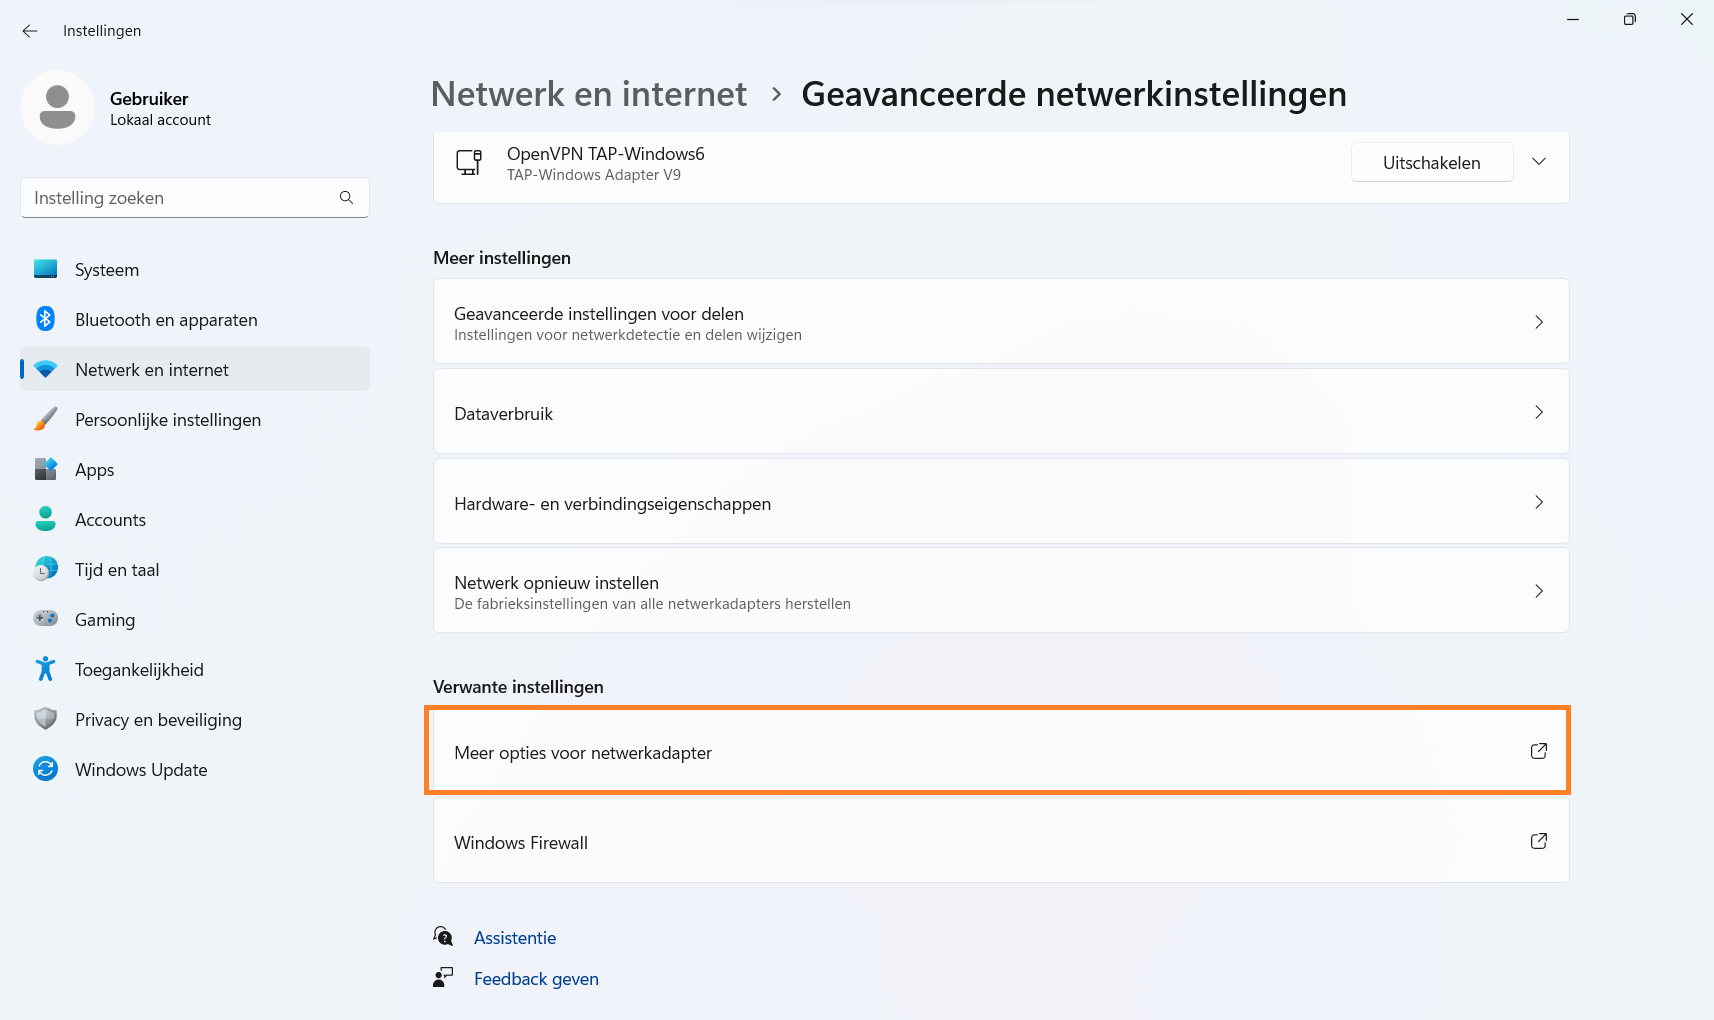
Open the Adapter Properties
- Click button "
Change adapter options"
7
Change the Adapter Properties
- Go to tab "
Network" - Disable "
Internet Protocol version 6" (IPv6) - Select "
Internet Protocol version 4" (IPv4), click button "Properties" - Click button "
Advanced" - In tab "
IP Settings", deselect option "Automatic Metric" and set fieldMetricto value "1" - In tab "
DNS", set fieldDNS Suffix for this connectionto the "Internal DNS-domain" of your 1A-server - Click
OKto close all the Properties windows - You can now fully use the VPN connection
Troubleshooting
1
Symptom: Cannot reach server by name
- Cause: Windows 11 does not resolv the internal servername over an IPSEC VPN-connection, for example
\\KLANT-1A - Solution: This can be resolved on your PC by changing the settings of your "VPN-adapter", see the instructions in "Configure"
- Workaround: Your 1A-server can also be reached on the "
Server IP-address" that you can find in server-info