Setting up a VPN connection (OpenVPN) - Windows 11
This manual is meant for 1A-server users.
It explains how you can make a secure connection to your company's network with the help of OpenVPN.
This way you can use your company's network just as when you are connected directly.
Only accounts that are a member of group "vpn" are allowed to connect through a VPN-connection.
Requirements
To complete this manual, you will need:
- Your username and password
- The OpenVPN configuration-file (ovpn file). You can download it from the Server Info page on your 1A server.
Usage
1
Start the OpenVPN Client
- Double-click icon "
OpenVPN Connect"

2
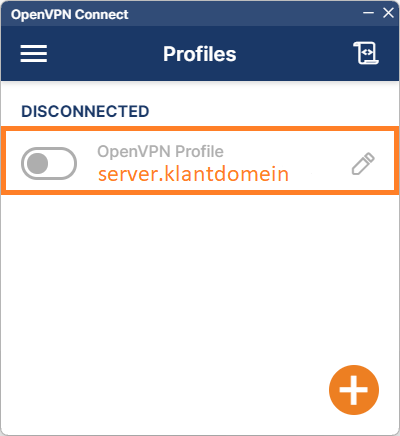
Reconnect with your company's network
- On the "
Profiles" page OpenVPN shows the networks you have connected with before. - Activate the slide on the left side of the "
OpenVPN Profile" to reconnect. - If you did not activate "
Save Password" OpenVPN wil ask for your password. - Note: Option "
Save password" is a potential risk, we recommend you do NOT use this, especially on shared computers
3
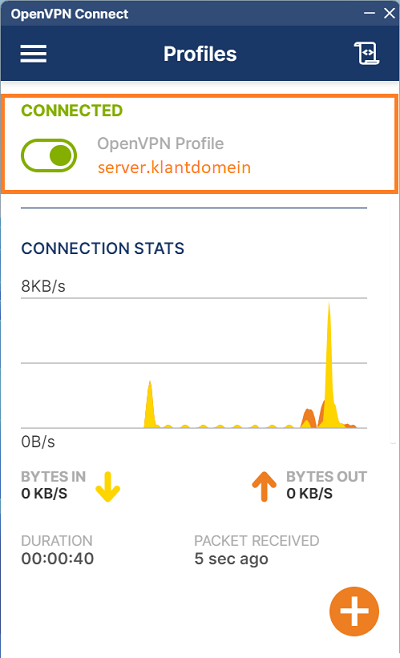
Connected to your company's network
- You are now connected to your company's network.
- If you want to disconnect, you can deactivate the slide.
4
Disconnect
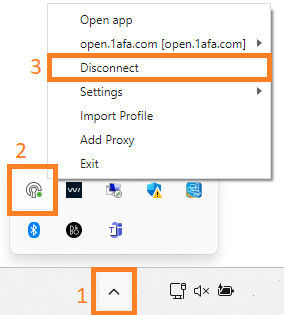
- On the right-hand side of your taskbar, click on the arrow pointing up.
- Right-click the OpenVPN icon.
- Select
Disconnect
Steps
1
Download and install the OpenVPN Client
- Go to https://openvpn.net/client/
- Download and install the OpenVPN Connect client
Example filename:openvpn-connect-3.6.0.4074_signed.msiTip: Execute the installer through right-click option "Run as Administrator"
2
Download the configuration-file
- Download the OpenVPN configuration-file (ovpn file) from the Server Info page on your 1A server
3
Start the OpenVPN Client (1)
- Double-click the "
OpenVPN Connect" icon

4
Start the OpenVPN Client (2)
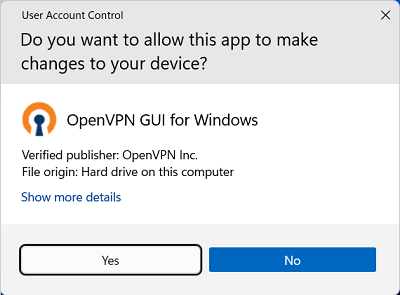
- At the popup for "User Account Control", click "
Yes" - After selecting
yesthis message will not appear again when starting OpenVPN. - You will not see this message if you have administrator access to your PC.
5
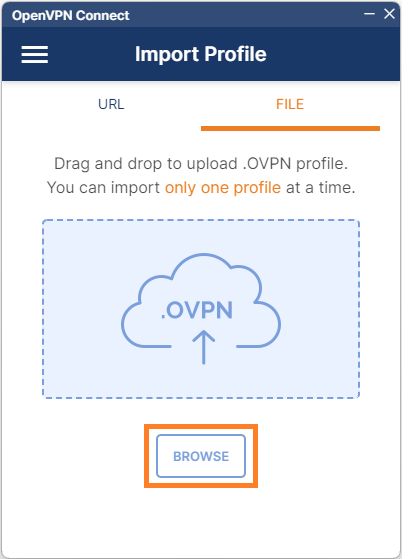
Import the configuration-file into the OpenVPN Client
- Click tab "
File" - Click button "
Browse" - Select the configuration-file
6
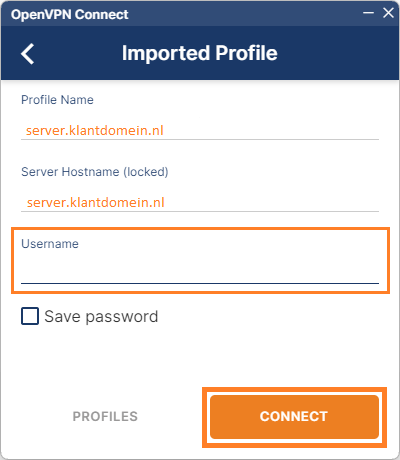
Connect with your company's network
- Fill in your
username - Click button "
connect" - Fill in your
password - Click button "
OK" - Note: Option "
Save password" is a potential risk, we recommend you do NOT use this, especially on shared computers
7
Done
- You are now connected to your company's network.
- If you want to disconnect, you can deactivate the slide.

Troubleshooting
1
Symptom: Cannot reach server by name
- Cause: Some versions of Windows 10 never query the DNS from the VPN-connection
- Solution: This can be resolved by changing a setting in the VPN network connection
2
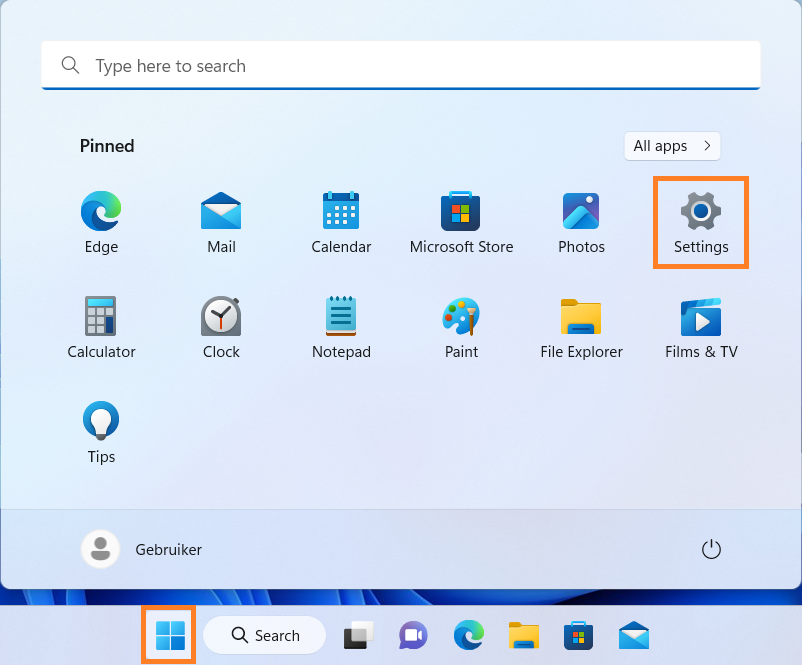
Open Network properties (1)
- Click
Start - Click
Settings
3
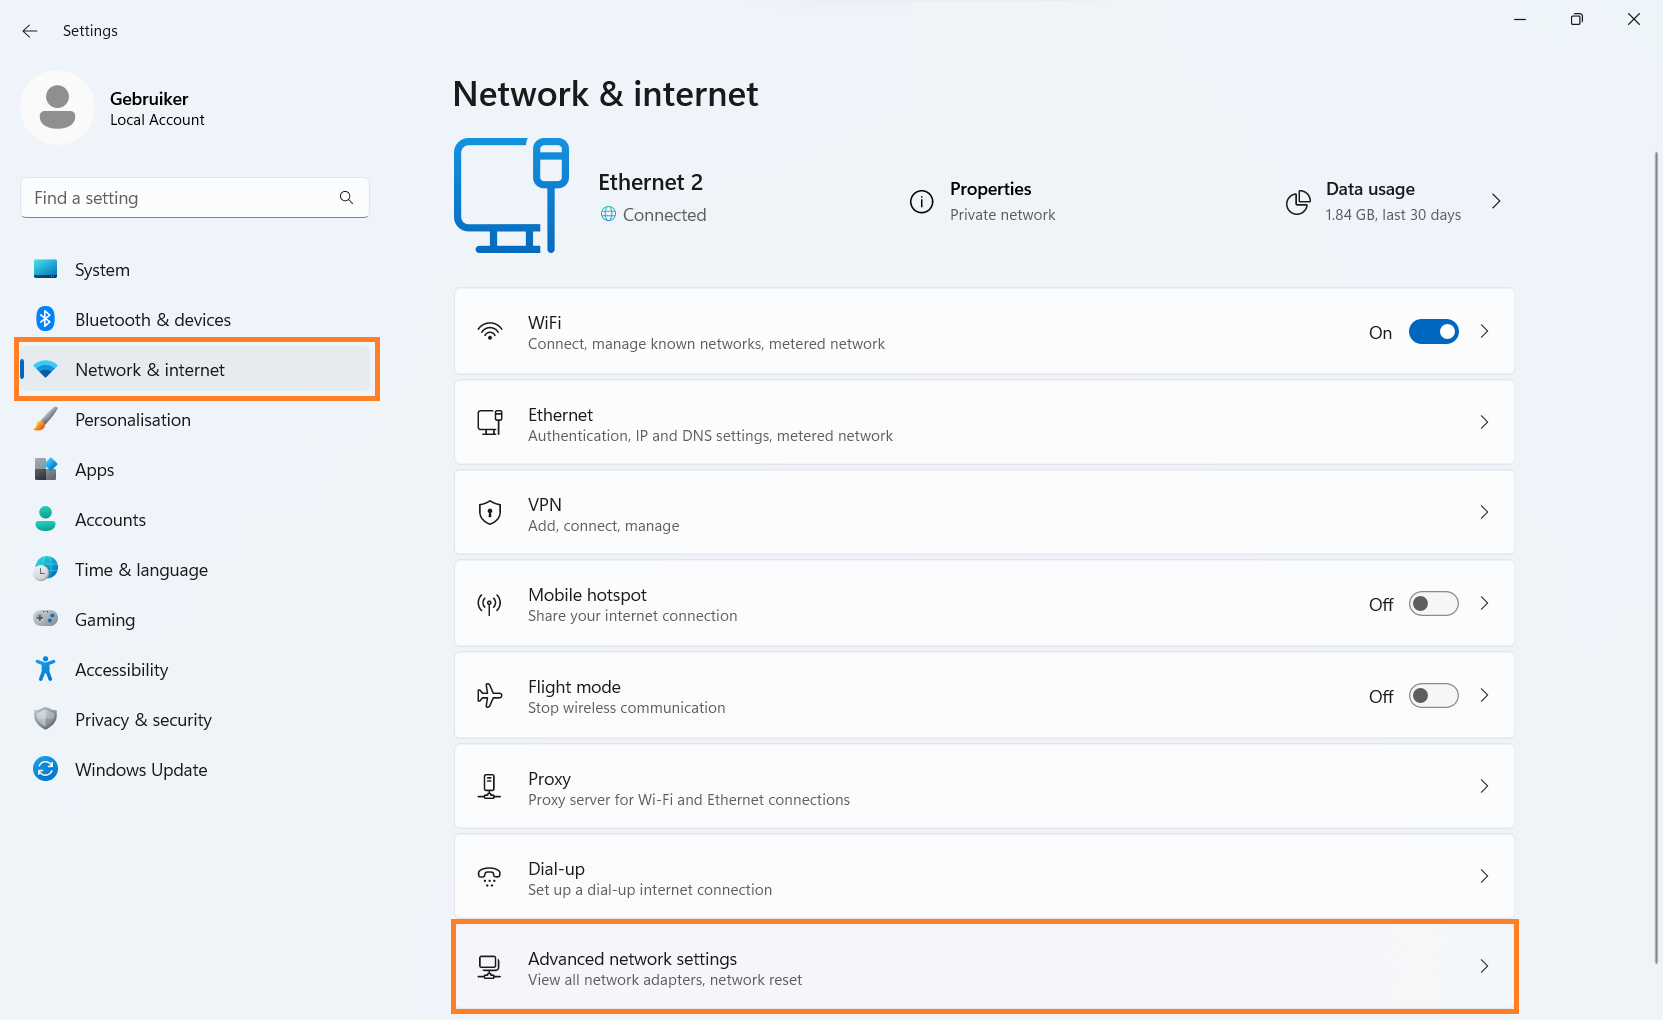
Open Network properties (2)
- Click
Network & Internet
4
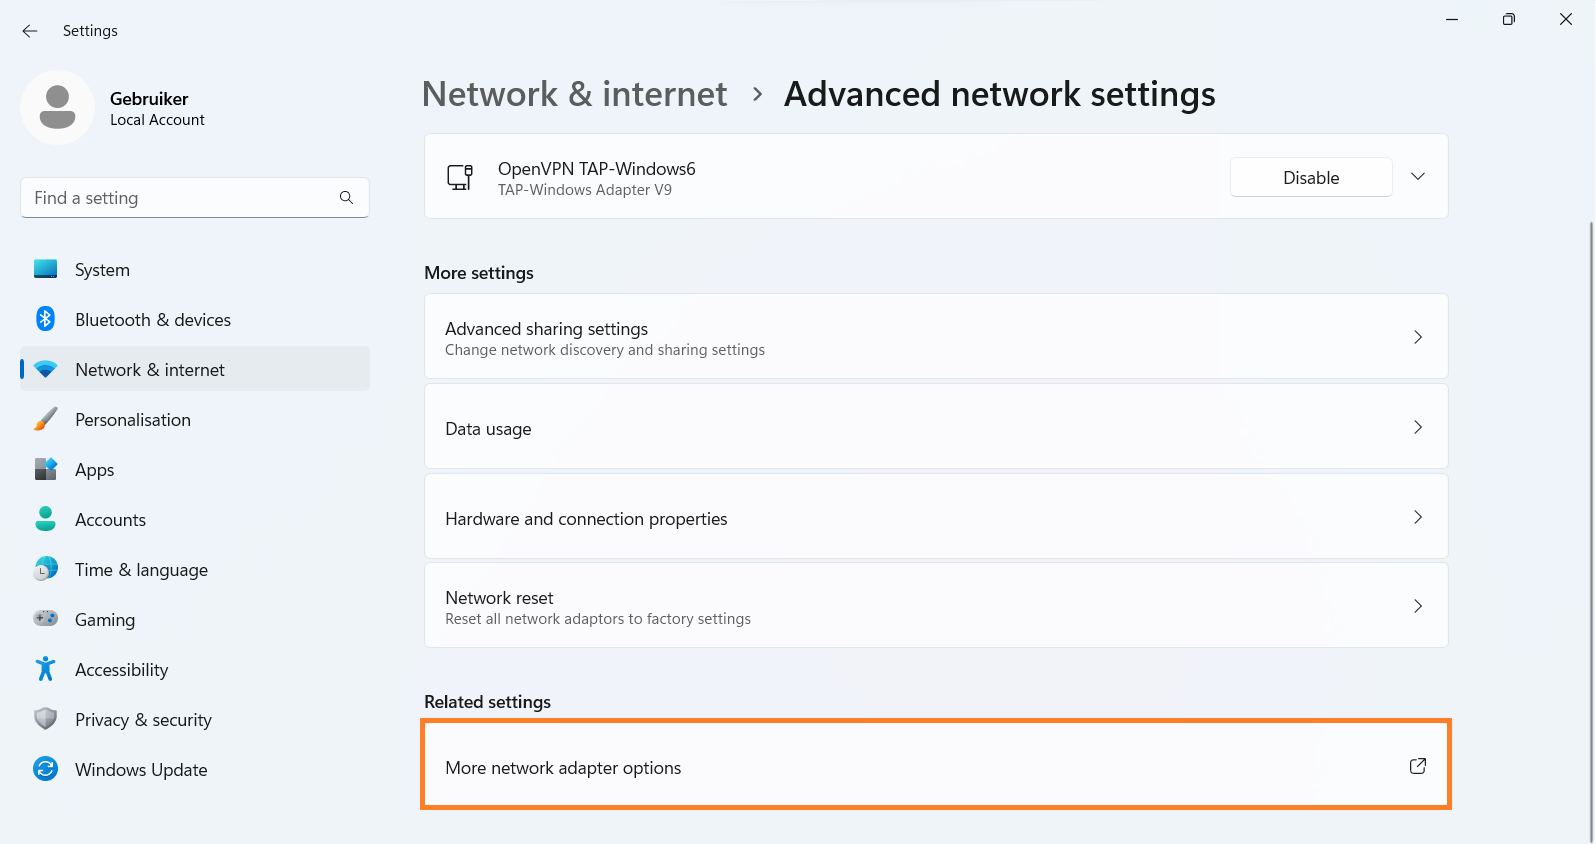
Change adapter settings
- Click
Change adapter settings
5
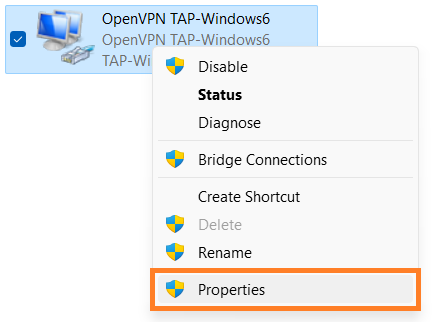
Open properties for your VPN connection
- Right-click your VPN connection (This is often called
Tap) - Click
Properties
6
Change IPv4 settings
- In tab
Networkselect IPv4 and openProperties - Click
Advanced - Uncheck
Automatic Metric - In field
Interface Metricenter "1" - Save the settings, return to the
Networktab for IPv6
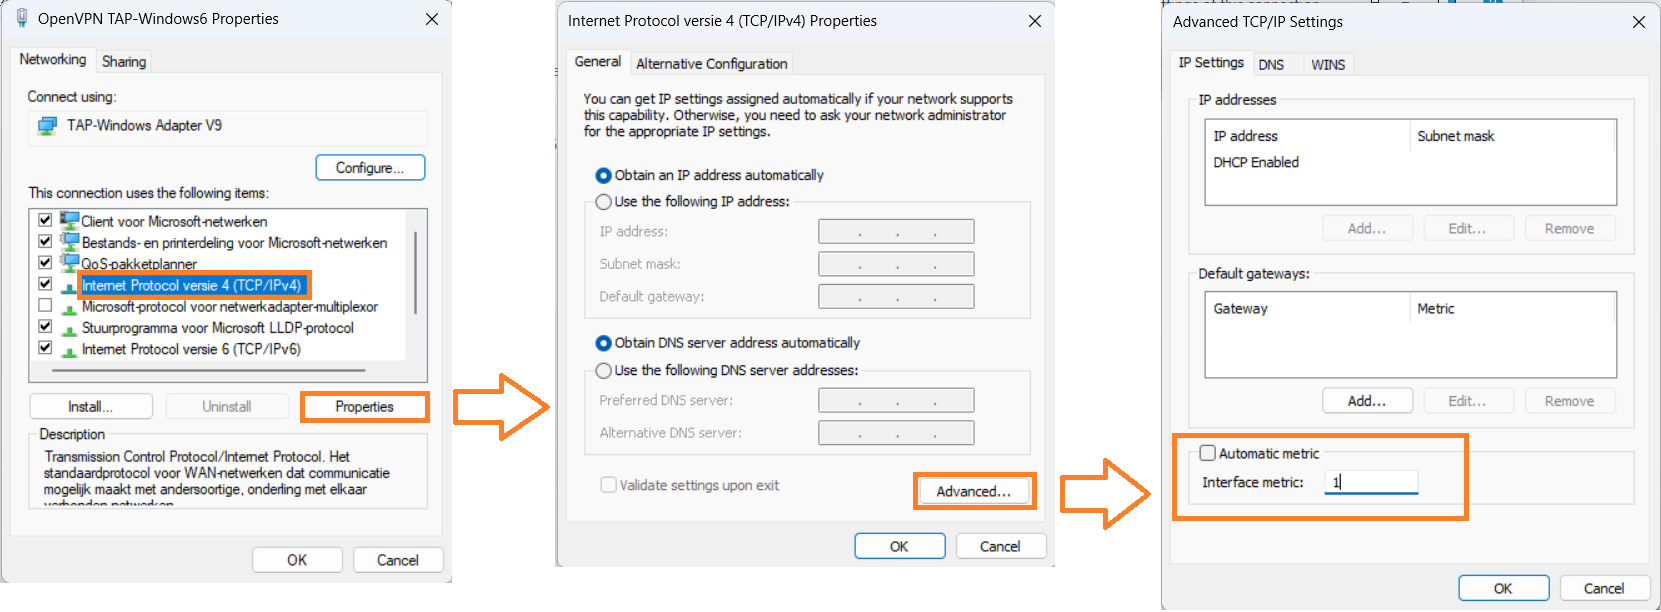
7
Change IPv6 settings
- In tab
Networkselect IPv6 and openProperties - Click
advanced - Uncheck
Automatic Metric - In field
Interface Metricenter "1" - Save the settings
8
Done
- Start the VPN connection
You should now be able to reach the server by name