Zarafa on macOS - macOS 10.10 Yosemite
This manual is for older systems and/or software and is no longer maintained.
This manual is written for 1A-server users who want to access their Zarafa email through Mac Mail. Zarafa is a workgroup solution based on the look and feel of Microsoft Outlook. By using Zarafa you can share your email and calendar online.
This manual explains how to configure Mac Mail to use Zarafa on your computer.
Requirements
To complete this manual, you will need:
- The name of your 1A-server
- Your username and password
- A computer with macOS 10.10 Yosemite
Steps
1
Mail - Account Create
- Open
System Preferences - Double click
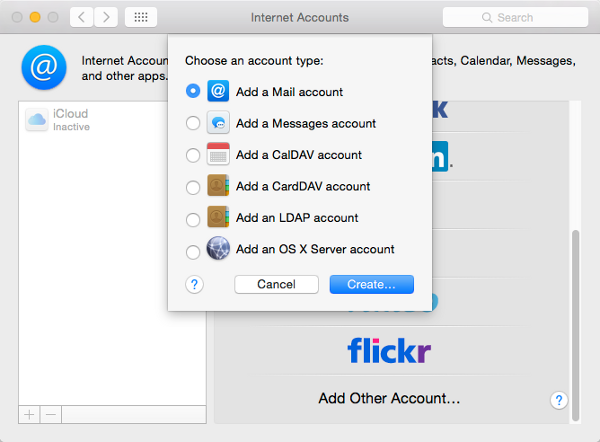
Internet Accounts - Click
Add Other Account - Select
Add a Mail account - Click
Create
2
Mail - Configure (1)
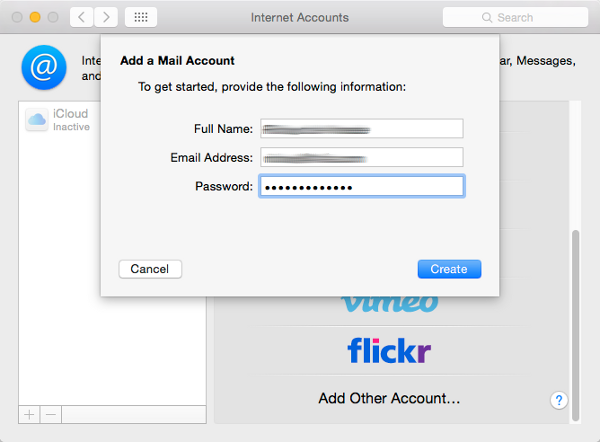
- Enter your
Full name(this will be shown to the recipient) - Enter your
E-mail address - Enter your
Password - Click
Create - Click
Next
3
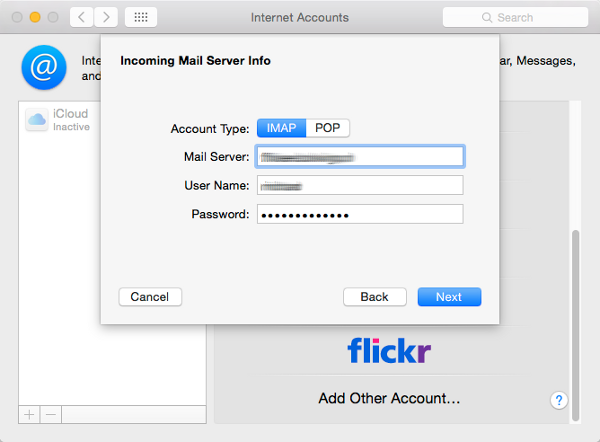
Mail - Configure (2)
- Enter your
Mail Server - Click
Next
4
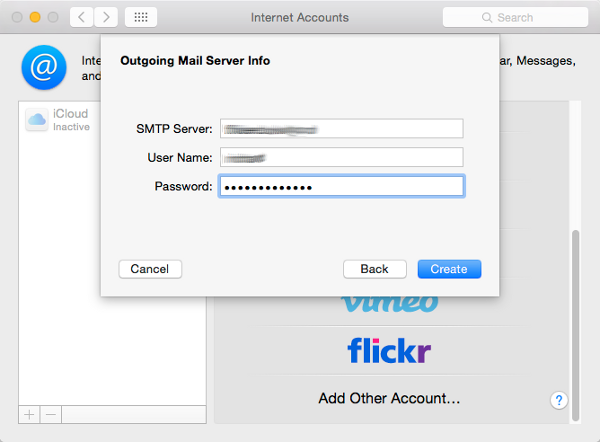
Mail - Configure (3)
- Enter your ''SMTP Server'
- Enter your
User Name - Enter your
Password - Click
Create
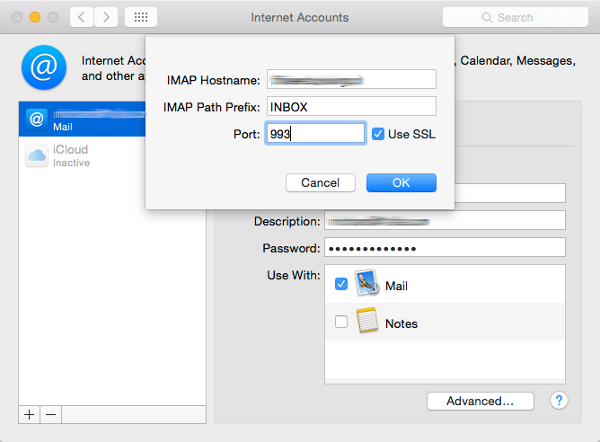
5
Mail - Configure (4)
- Click
Advanced - At
Poortenter: "993" - Click
OK
6
Calendar - Find the CalDAV url of the calendar
- Log in to WebAccess or WebApp (the Zarafa webmail client)
- Note the name of the calendar in lowercase and replace whitespaces with '%20'
- Compose the CalDAV url: "https://<servername>:8442/caldav/<username>/<calendar-name>"
For example:https://company.com.alt001.com:8442/caldav/peter/calendarorhttps://company.com.alt001.com:8442/caldav/peter/agenda
Example with whitespaces:https://company.com.alt001.com:8442/caldav/peter/calendar%20with%20whitespaces
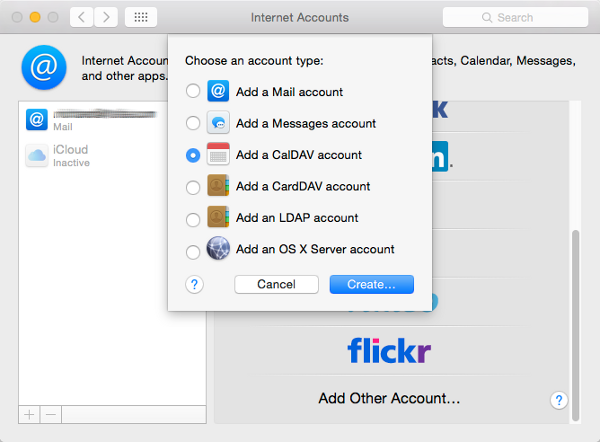
7
Calendar - Account Create
- Open
System Preferences - Double click
Internet Accounts - Click the plus icon
- Click
Add Other Account - Select
Add a CalDAV account - Click
Create
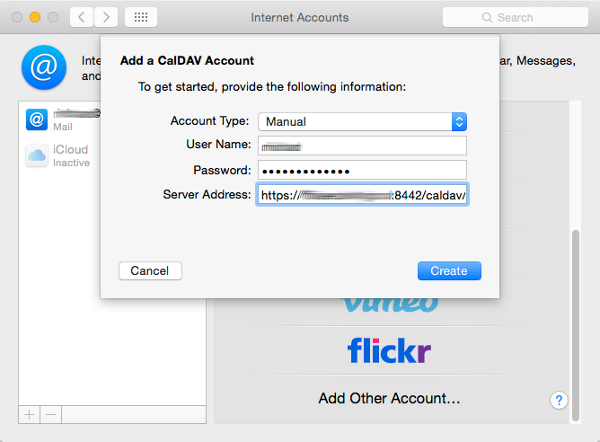
8
Calendar - Configure (1)
- Change
Type accountto "Manual" - Enter your
User Name - Enter your
Password - At
Server Addressenter the CalDAV url - Click
Create
9
Contacts - Finding the CardDAV url
- In your browser, go to "http://<servername>/sabre-zarafa/addressbooks/"
- Log in with your username and password
- Click on your username
- Now you see all your addressbooks. The default addressbook is "Contacts" (or "Contactpersonen" when Zarafa has been configured to use the Dutch language)
- Copy the link of the addressbook you want to add
- Paste the link in an empty text file
- Remove "http://" and append "/"
- The CardDAV url should now look like this: "https://<servername>/sabre-zarafa/addressbooks/<username>/<addressbook>/"
For example:https://company.com.alt001.com/sabre-zarafa/addressbooks/peter/Contacts/orhttps://company.com.alt001.com/sabre-zarafa/addressbooks/peter/Contactpersonen/
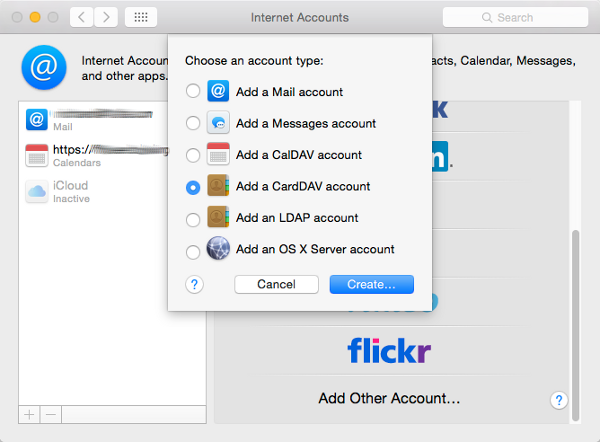
10
Contacts - Account Create
- Open
System Preferences - Double click
Internet Accounts - Click the plus icon
- Click
Add Other Account - Select
Add a CardDAV account - Click
Create
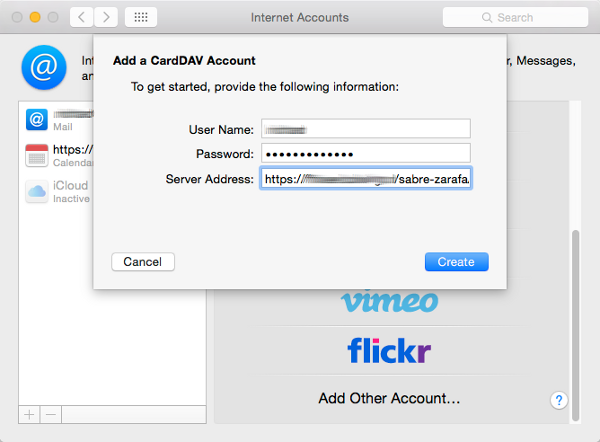
11
Contacts - Configure (1)
- Enter your
User Name - Enter your
Password - At
Server Addressenter the CardDAV url - Click
Create
12
Using Mail, Calendar and/or Contacts
- Close the window
Internet Accounts - Open
Mail,Calendarand/orContacts
Troubleshooting
1
Mac Calendar - Adding a public calendar
- The CalDAV url is constructed as follows: "https://<servername>:8442/caldav/public/<calendar-name>"
Example: https://company.com.alt001.com:8442/public/our%20public%20calendar
To add a public calendar, follow the steps above.
2
Mac Calendar - Adding a shared calendar
- The CalDAV url is constructed as follows: "https://<servername>:8442/caldav/<username-of-your-collegue>/<calendar-name>"
Example: https://company.com.alt001.com:8442/caldav/john/calendar
To add a shared calendar, follow the steps above.You need access permissions on the calendar you wish to open. This can be done as follows by a Zarafa Admin: - Log in to Zarafa WebAccess
- Go to the calendar
- Right-click on the name of the calendar
- Go to
Properties→ tabPermissions - Click
Add - Select a user
- Grant the appropriate permissions
- Right-click on the inbox of this user
- Go to
Properties→ tabPermissions - Click
Add - Select a user
- Check
Folder visible