Fax printer Winprint HylaFAX - Windows XP
Microsoft has ceased security support for Windows XP on 8 April 2014. This means that PCs running Windows XP will no longer be safe to use.
Please contact your 1A partner to obtain a more recent operating system or a new PC.
This manual is for older systems and/or software and is no longer maintained.
This manual explains how to install the Winprint HylaFAX fax program on your computer. Installing the program will enable you to send and receive faxes on your computer through your 1A-server.
Winprint HylaFAX is a virtual Windows printer designed to send its output directly to a HylaFAX Server. Once installed, you can print to the HylaFAX Server on your 1A-server from any application. Winprint HylaFAX is not intended to be a all encompassing fax machine, it is just a quick and easy way to send faxes from any Windows application.
In order for Winprint HylaFAX to work you need to install the software on your computer. Next you need to install and configure a virtual printer, so HylaFAX can communicate with your 1A-server to send the faxes.
Requirements
To complete this manual, you will need:
- Winprint HylaFAX software installer installed
- Your username and password
- The login credentials for the local administrator
- The name or IP address of your 1A-server
Steps
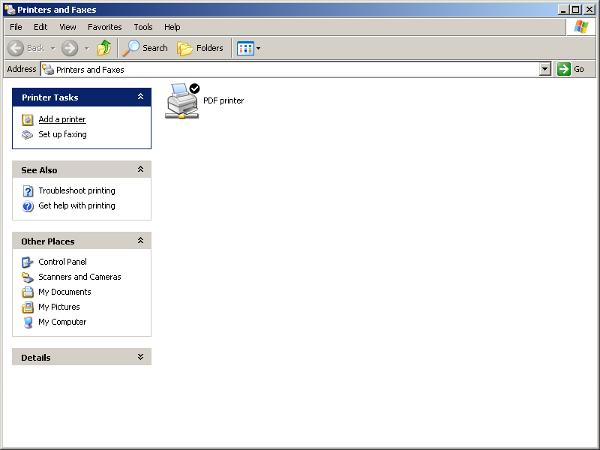
Add the fax printer (1)
- Click the start button
- Go to "Printers and Faxes"
- Click
Add a printer
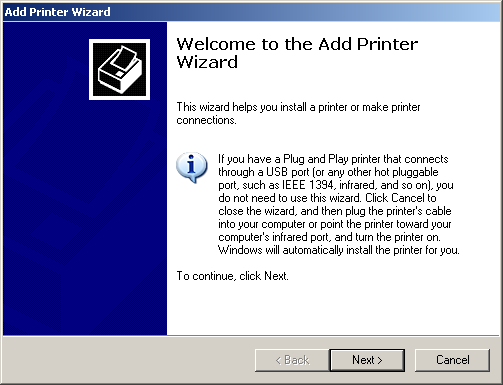
Add the fax printer (2)
- Click
Next
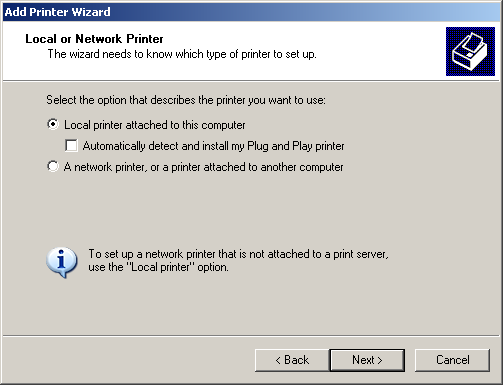
Add the fax printer (3)
- Choose
Local printer attached to this computer - Uncheck
Automatically detect and install my Plag and Play printer - Click
Next
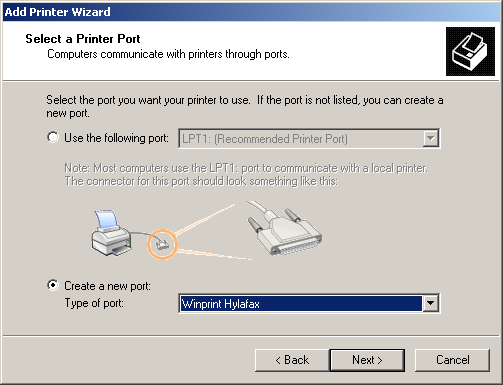
Add the fax printer (4)
- Choose
Create a new port - Choose
Winprint Hylafax - Click
Next
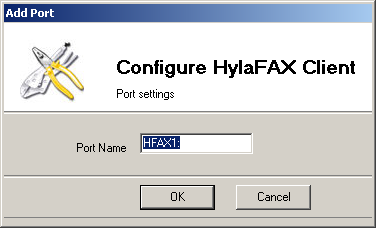
Add the fax printer (5)
- At
Port Nameenter: "HFAX1:" - Click
OK
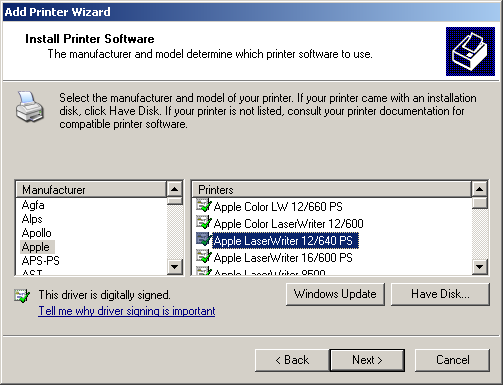
Add the fax printer (6)
- At
Manufacturerchoose "Apple" - At
Printerschoose "Apple LaserWriter 12/640 PS" - Click
Next
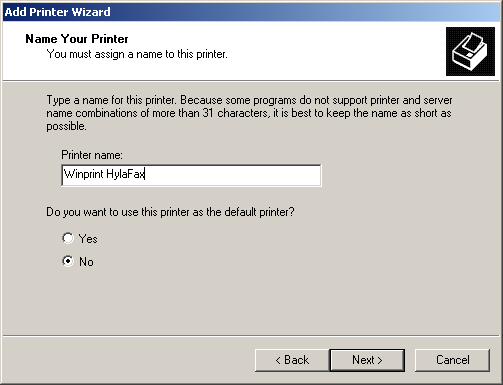
Add the fax printer (7)
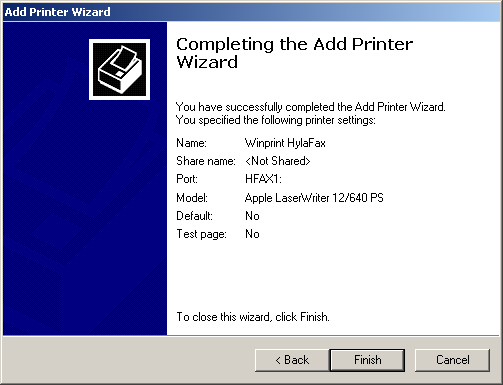
- At
Printer nameenter: "Winprint HylaFAX" - At
Do you want to use this printer as the default printer?choose "No" - Click
Next
Add the fax printer (8)
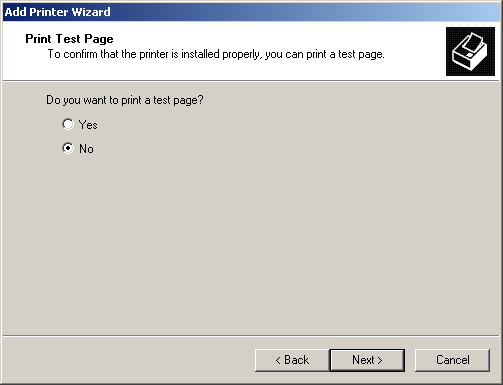
- At
Do you want to print a test page?choose "No" - Click
Next
Add the fax printer (9)
- Click
Finish - If you are asked whether you want to share the printer, click "No"
Configuring the printer properties (1)
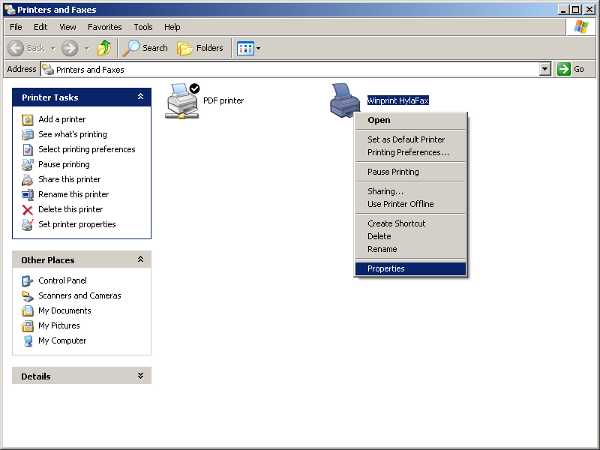
- Click the start button
- Go to "Printers and Faxes"
- Right-click the printer "Winprint HylaFAX"
- Choose
Properties
Configuring the printer properties (2)
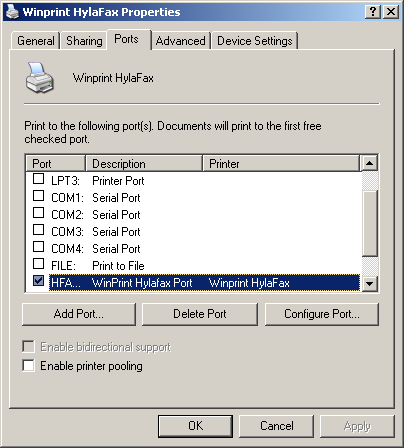
- Go to tab
Ports - Click on the port
HFAX1: - Click
Configure Port...
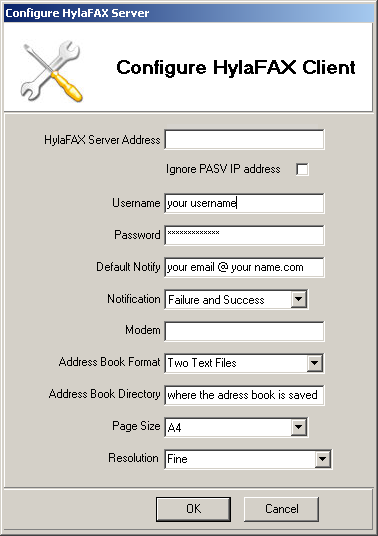
Configuring the printer properties (3)
- At
HylaFAX Server Addressenter the name or the IP address of your server - Enter your
Username - Enter your
Password - Enter your e-mail address at
Default Notify - Choose at
Notificationwhich notifications you wish to receive from HylaFAX - Choose "A4" at
Page Size(default for Europe) - Choose "Fine" at
Resolution
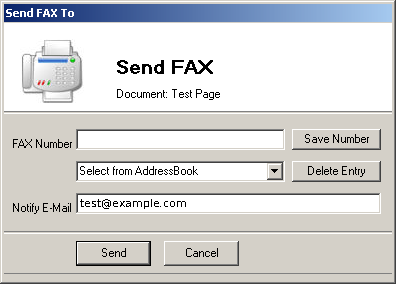
Sending a fax
- Now you can print to the printer "Winprint HylaFAX" from any program
- At
FAX Numberenter the receiving fax number or choose one from the address book - At
Notify E-Mailenter the e-mail address where the notifications for the fax message should go - Click
Send