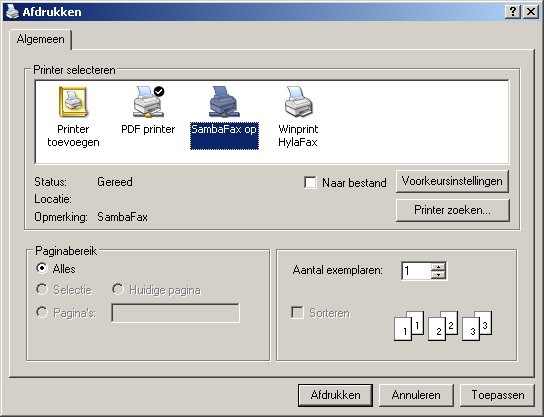
Fax printer Sambafax - Windows XP
Microsoft has ceased security support for Windows XP on 8 April 2014. This means that PCs running Windows XP will no longer be safe to use.
Please contact your 1A partner to obtain a more recent operating system or a new PC.
This manual is for older systems and/or software and is no longer maintained.
This manual explains how to use your 1A-server to send and receive faxes through Sambafax. Your 1A-server is equipped with a HylaFAX fax server that can be accessed in two ways: through the server through Sambafax, or by installing a print monitor such as Winprint.
When you try to send a fax via Sambafax, your computer will send the fax via Samba to HylaFAX on your 1A-server. This will allow you to send faxes quickly and easily by including a fax number in your message.
To use Sambafax you do not need to install any software. You just need to add a network printer and your fax will work. This manual explains how to add a network printer and use it to send faxes.
Requirements
To complete this manual, you will need:
- A computer connected to your 1A-server
- Your username and password
- The name or IP address of your 1A-server
Steps
1
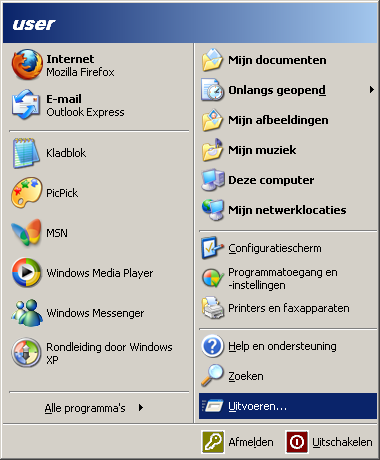
Open the browselist on the server (1)
- Click the start button
- Click
Run
2
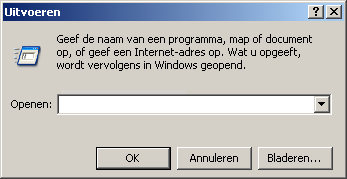
Open the browselist on the server (2)
- Enter
\\yourservername\(substitute "yourservername" with the name of your 1A server) - Click
OK
3
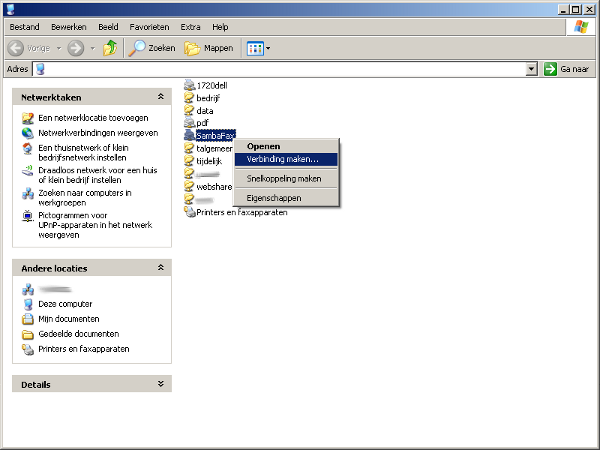
Install Sambafax
- Right-click the printer
SambaFax - Choose
Connect... - Should you receive a security warning, click
Yes
4
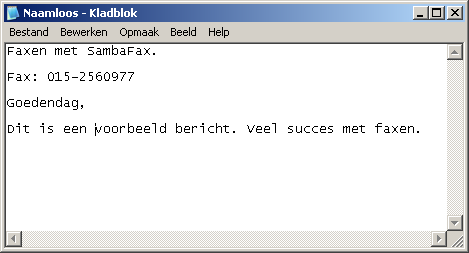
Sending a fax (1)
- Open the document you want to send
- Add the code phrase "Fax: <faxnumber>"
(substitute <faxnumber> with the number of the recipient)
5
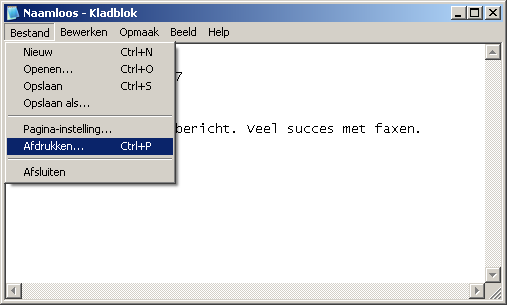
Sending a fax (2)
- Print the document
6
Sending a fax (3)
- Select the printer "SambaFax"
- Click
Print - Your document will be sent through your 1A-server. If you have an e-ail address connected to your account, you will receive an e-mail containing the status of your fax.
