Nextcloud WebDAV - Macos
This manual is for users that use Nextcloud on their 1A-server.
This manual explains how to install the Nextcloud Sync-client on your mac desktop.
With Nextcloud it's quite easy and safe to share files with colleagues in and outside your office.
This can be done through your Webbrowser, by connecting WebDAV-Shares or using the Nextcloud Sync-client. .
Is Nextcloud not active on your 1A-server? Please contact your 1A-partner.
With WebDAV-Shares you can access your files directly from your 1A-server, without first downloading them to your Mac.
This is similar to working with Network-shares, though the WebDAV-share responds a bit slower and is less suitable for actions on large amounts of files.
Requirements
To complete this manual, you will need:
- Nextcloud on your 1A-server.
- A Mac computer.
- Your username and password
- Your 1A-serveraddress
Steps
1
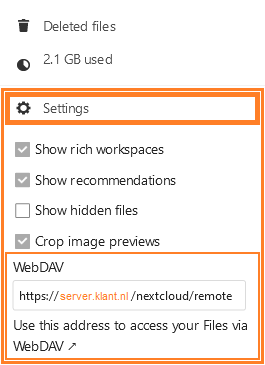
Find Your Nextcloud WebDAV-URL
- Log in on your Nextcloud Web
- At the bottom-left, click
Settings - This shows your
WebDAVURL, you will need this later
2
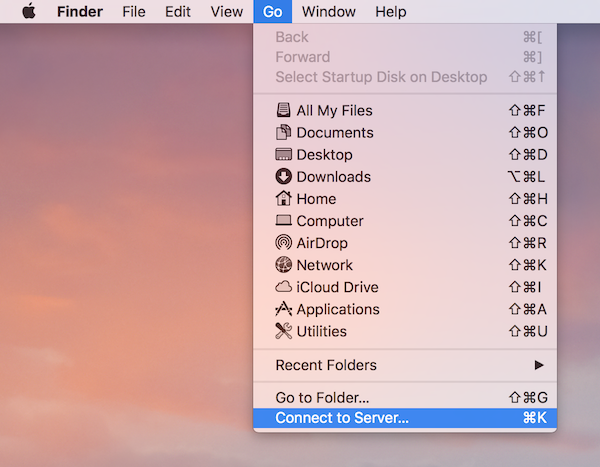
Connect your Nextcloud WebDAV-URL on your Mac (1)
- Open Finder
- Click "
Go" and select "Connect to Server..."
3
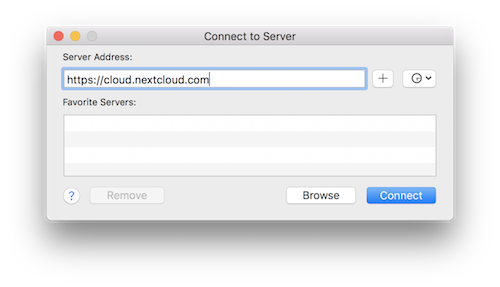
Connect your Nextcloud WebDAV-URL on your Mac (2)
- In field "
Server address", paste or type your WebDAV-URL - Click button "Connect"
4
Connect your Nextcloud WebDAV-URL on your Mac (3)
- You can now access your files through Nextcloud WebDAV as a shared drive
Troubleshooting
1